
Behavioral cloning
Published:
Train a deep neural network to drive a car on winding road autonoumosly.
Behavioral Cloning
github repo https://github.com/gwwang16/CarND-Behavioral-Cloning-P3
Video: https://youtu.be/JaKkGIGe4zo
Features:
- Use the simulator to collect data of good driving behavior
- Build convolution neural network in Keras that predicts steering angles from images
- Train and validate the model with a training and validation set
- Test that the model successfully drives around track one without leaving the road
Model Architecture and Training Strategy
1. Training data collecting
To capture good driving behavior, I used a joystick to drive the vehicle to collect training data with smooth steering angle, I also drived the vehicle with higher speed as much as possible in simulator so that the training data contains data with higher steering angle, which is useful for higher speed running in autonous mode.
There are two tracks in this simulator.
For Track1, there is only one lane on the road, so the method is keeping the vehicle running without rolling on sideline. This track is quite simple, so one extra round data is collected.
For Track2, there are two lanes on the road, so the method is keeping the vehicle running on one side all the time. Traffic accident often occures in some special places, so I re-collected more data pieces at there.
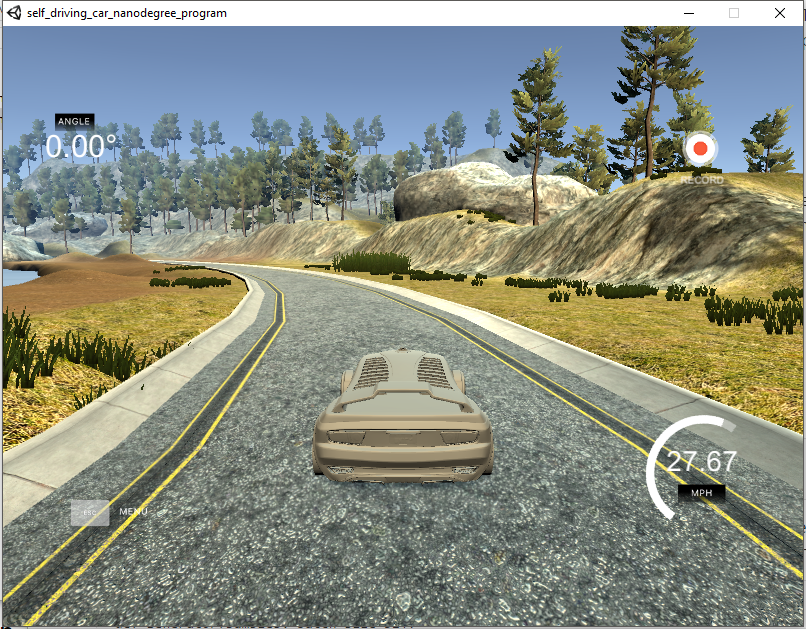 | 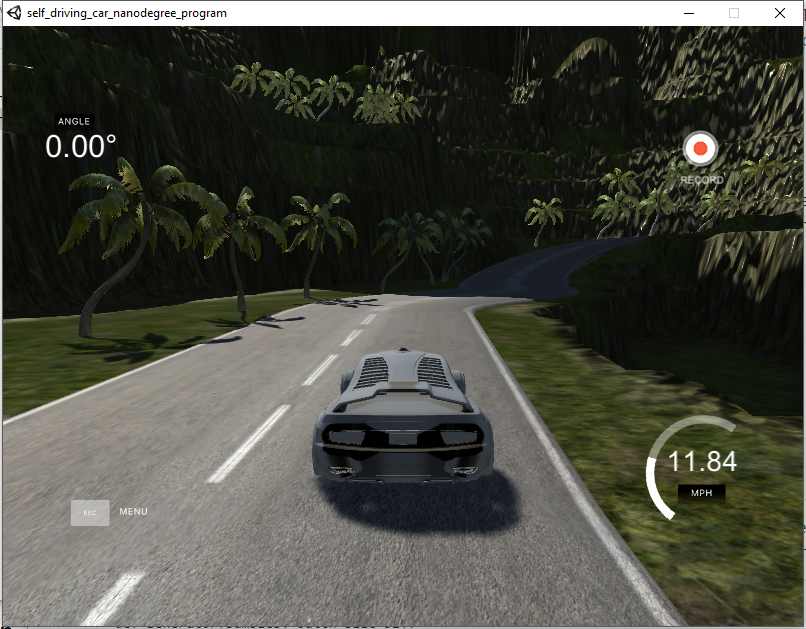 |
|---|---|
| Scenario on track1 | Scenario on track2 |
Examples of the collected data on two tracks.
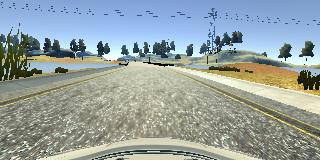 | 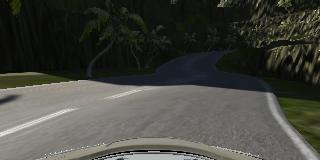 |
|---|---|
| data example on track1 | data example on track2 |
2. Training data processing
The training data is split into train and validation data using
from sklearn.model_selection import train_test_split
train_samples, validation_samples = train_test_split(data_all, test_size=0.1)
To increase data, image flip is method adopted randomly using getrandbits(). To deal with the problem of different image path and convert image type, some code is added into generator in the same time.
from random import getrandbits
def generator(samples, batch_size=32):
    '''data generator'''
    num_samples = len(samples)
    while 1:  # Loop forever so the generator never terminates
        for offset in range(0, num_samples):
            batch_samples = samples[offset:offset+batch_size]
            images = []
            angles = []
            for index in range(0, batch_size):
                # replace \\ to / for the collected data path
                img_name = batch_samples.iloc[index]['path'].replace('\\','/')
                path_dic = img_name.split('/')
                file_path = './data/'+path_dic[-3]+'/'+path_dic[-2]+'/'+path_dic[-1]
                image = cv2.imread(file_path)
                image = cv2.cvtColor(image, cv2.COLOR_BGR2HSV)
                angle = float(batch_samples.iloc[index]['steering'])
                # generate true or false randomly
                if bool(getrandbits(1)):
                    image = np.fliplr(image)
                    angle = - angle
                images.append(image)
                angles.append(angle)
            X_train = np.array(images)
            y_train = np.array(angles)
            yield X_train, y_train
3. Model architecture
My model for track1 consists of a convolution neural network followed with full connected network. I use a convolution neural network model similar to the nvidia model firstly. But this model performs not well at first, in order to increase the model performance, I increased Conv layers and filters number. The model is shown as following
- The image is cropped using keras cropping layer, and then it is resized and normalized in the model using a keras lambda layer. The model is shown as following.
- ReLU activation function and same padding method are used for each ConvNet.
- Adam optimizer is adopted.
- Drop out with 0.5 is added for each fully connected layer to avoid over fitting problem.
model = Sequential()
model.add(Cropping2D(cropping=((65,20),(0,0)), input_shape=(160,320,3)))
model.add(Lambda(resize_img))
model.add(Lambda(lambda x: x/255.0 - 0.5))
model.add(Conv2D(16, kernel_size=(5, 5), strides=(1,1),
                 padding='same', activation='relu'))
model.add(Conv2D(32, kernel_size=(3, 3), strides=(2,2),
                 padding='same', activation='relu'))
model.add(Conv2D(32, kernel_size=(3, 3), strides=(2,2),
                padding='same', activation='relu'))
model.add(Conv2D(64, kernel_size=(3, 3), strides=(2,2),
                 padding='same', activation='relu'))
model.add(Conv2D(64, kernel_size=(3, 3), strides=(2,2),
                 padding='same', activation='relu'))
model.add(Conv2D(128, kernel_size=(3, 3), strides=(2,2),
                 padding='same', activation='relu'))
model.add(Flatten())
model.add(Dense(256, activation='relu'))
model.add(Dropout(0.5))
model.add(Dense(50, activation='relu'))
model.add(Dropout(0.5))
model.add(Dense(10, activation='relu'))
model.add(Dropout(0.5))
model.add(Dense(1))
optimizer = Adam(lr=learning_rate)
model.compile(loss='mse', optimizer=optimizer)
The model for track2 is used nvidia model immediately cause I found it performs better on track2. And the image flip method is removed cause the image is not symmetrical on track2.
model2 = Sequential()
model2.add(Cropping2D(cropping=((40,20),(0,0)), input_shape=(160,320,3)))
model2.add(Lambda(resize_img))
model2.add(Lambda(lambda x: x/255.0 - 0.5))
model2.add(Conv2D(24, kernel_size=(5, 5), strides=(2,2),
                 padding='valid', activation='relu', name='Conv_1'))
model2.add(Conv2D(36, kernel_size=(5, 5), strides=(2,2),
                 padding='valid', activation='relu', name='Conv_2'))
model2.add(Conv2D(48, kernel_size=(5, 5), strides=(2,2),
                 padding='valid', activation='relu', name='Conv_3'))
model2.add(Conv2D(64, kernel_size=(3, 3), strides=(1,1),
                 padding='valid', activation='relu', name='Conv_4'))
model2.add(Conv2D(64, kernel_size=(3, 3), strides=(1,1),
                 padding='valid', activation='relu', name='Conv2D_5'))
model2.add(Flatten(name='flatten_1'))
model2.add(Dense(100, activation='relu', name='dense_1'))
model2.add(Dropout(0.5))
model2.add(Dense(50, activation='relu', name='dense_2'))
model2.add(Dropout(0.5))
model2.add(Dense(10, activation='relu', name='dense_3'))
model2.add(Dropout(0.5))
model2.add(Dense(1))
optimizer = Adam(lr=learning_rate)
model2.compile(loss='mse', optimizer=optimizer)
4. Model parameter tuning
The model parameters are tuned as following. The Adam optimizer is used, the rate is set with default value.
epochs = 20
batch_size = 128
learning_rate = 0.001
train_steps = len(train_samples)//batch_size
validation_steps = len(validation_samples)//batch_size
5. Model training
The model is trained with keras fit_generator().
model.fit_generator(train_generator,
                    validation_data=validation_generator,
                    steps_per_epoch=train_steps,
                    validation_steps=validation_steps,
                    epochs=epochs,callbacks=callbacks)
6. Training results
The training results are shown as following
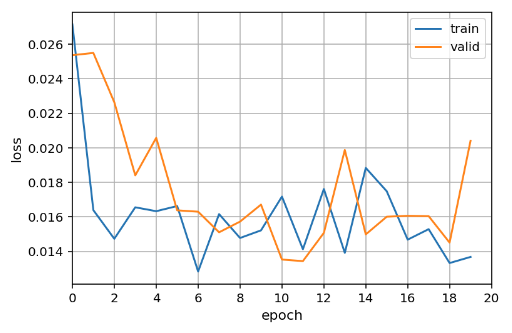 | 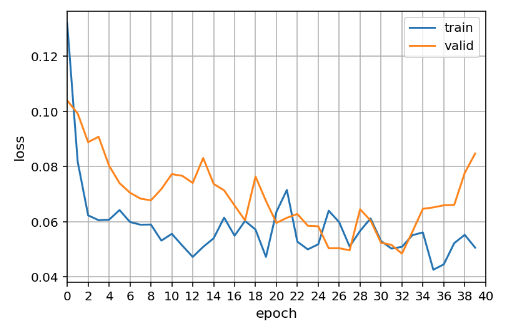 |
|---|---|
| Training result on track1 | Training result on track2 |
The trained models are used for driving vehicle autonomously in the simulator, The results can be found in the following links.
Track 1: https://youtu.be/nH_HCqSrtCw
Track 2: https://youtu.be/JaKkGIGe4zo
The trained model on track1 can perfectly run with 30 MPH.
But the model on track2 will be stuck in 1-2 places.
Further improvement
The trained model still cannot perform perfectly on track2, I increased those particular data pieces and fine tuned on them again, but this one’s and that’s broken. I would like to adjust model structure and try to do some methods about data processing in the future.